To winterize a septic system, have the tank pumped and inspected in early fall, spread a thick layer of mulch or straw over the tank and drain field, insulate any exposed pipes, fix leaks, and keep warm wastewater flowing through the system on a regular schedule through the cold months. That is the whole job in one sentence, and it is worth doing before the first hard freeze rather than after it. A septic system works quietly underground for most of the year, and winter is when small problems turn into big ones. Cold weather does not usually create a problem out of nothing. It exposes parts of a system that were already weak, shallow, or overdue for service, and it does so at the worst possible time, when the ground is frozen and repairs are slow and difficult.
Why Winter Is Hard on a Septic System
Most winter septic problems follow the same pattern. A pipe that was only just deep enough in summer freezes during a long cold spell. A tank that was already full of sludge has less room for incoming water, so a small freeze becomes a backup. A drain field that was driven over in the fall has compacted soil that freezes faster and drains more slowly. None of these are sudden failures. They are conditions that built up over months, and winter is simply the season when they finally show themselves. That is why this work is best done in the fall, while the ground is still soft and a professional can still reach the tank without digging through frozen soil. If you want a fuller picture of what cold can do, our guide to whether a septic tank can freeze in winter explains how freezing starts and which parts of a system are most at risk.
When to Start Winterizing
The right time to winterize a septic system is early fall, well before the ground freezes. That timing matters more than any single step in this guide. Once the soil is frozen, you cannot spread mulch effectively, you cannot dig to reach a pipe, and a pumping truck cannot easily open a tank lid that is frozen shut. Work done in September or October is straightforward. The same work done in January is an emergency job, and emergency jobs are harder, slower, and more stressful for everyone involved.
Start with the tasks that need a professional. If the tank is due for pumping, book it early, because septic companies get busy in the fall as every homeowner in a cold climate has the same idea at the same time. An inspection at the same visit can catch a cracked baffle, a damaged lid, or a pipe that is sitting too shallow, while there is still time to fix it. The rest of the work, spreading mulch, insulating pipes, checking gutters, and fixing a running toilet, is the kind of thing most homeowners can handle in a weekend or two. It also helps to put winterizing on a regular seasonal rhythm. Our month by month septic maintenance schedule shows where fall preparation fits alongside the rest of the year, so winter work becomes part of a routine instead of a scramble every November.
Step One: Pump and Inspect the Tank in Early Fall
Fall pumping is the single most useful winterizing step for most households, and it is the one to do first. Over time, solid waste settles to the bottom of the tank as sludge and lighter material floats to the top as scum. The space between those two layers is where the system does its work, and as sludge builds up that working space shrinks. A tank that is nearly full has less room for incoming wastewater, and it is more likely to push solids toward the drain field, where they can clog the soil. Cold weather makes all of that worse, because a system with little spare capacity has no room to absorb a freeze, a slow drain, or a sudden surge of water from holiday guests.
The EPA says household septic tanks are typically pumped every three to five years, and that range is a useful starting point rather than a strict rule. A large household, a small tank, a garbage disposal, or heavy water use can all shorten the interval. The honest answer for any home is to have the tank inspected and let the level of sludge decide. A professional can measure the layers, check the baffles and the inlet and outlet pipes, and tell you whether pumping is due now or can wait. If you are unsure when the tank was last pumped, fall is the right time to find out. The EPA septic guidance is a good place to read more about how often pumping is needed and how a system is meant to be cared for.
Step Two: Insulate the Tank and Drain Field With Mulch
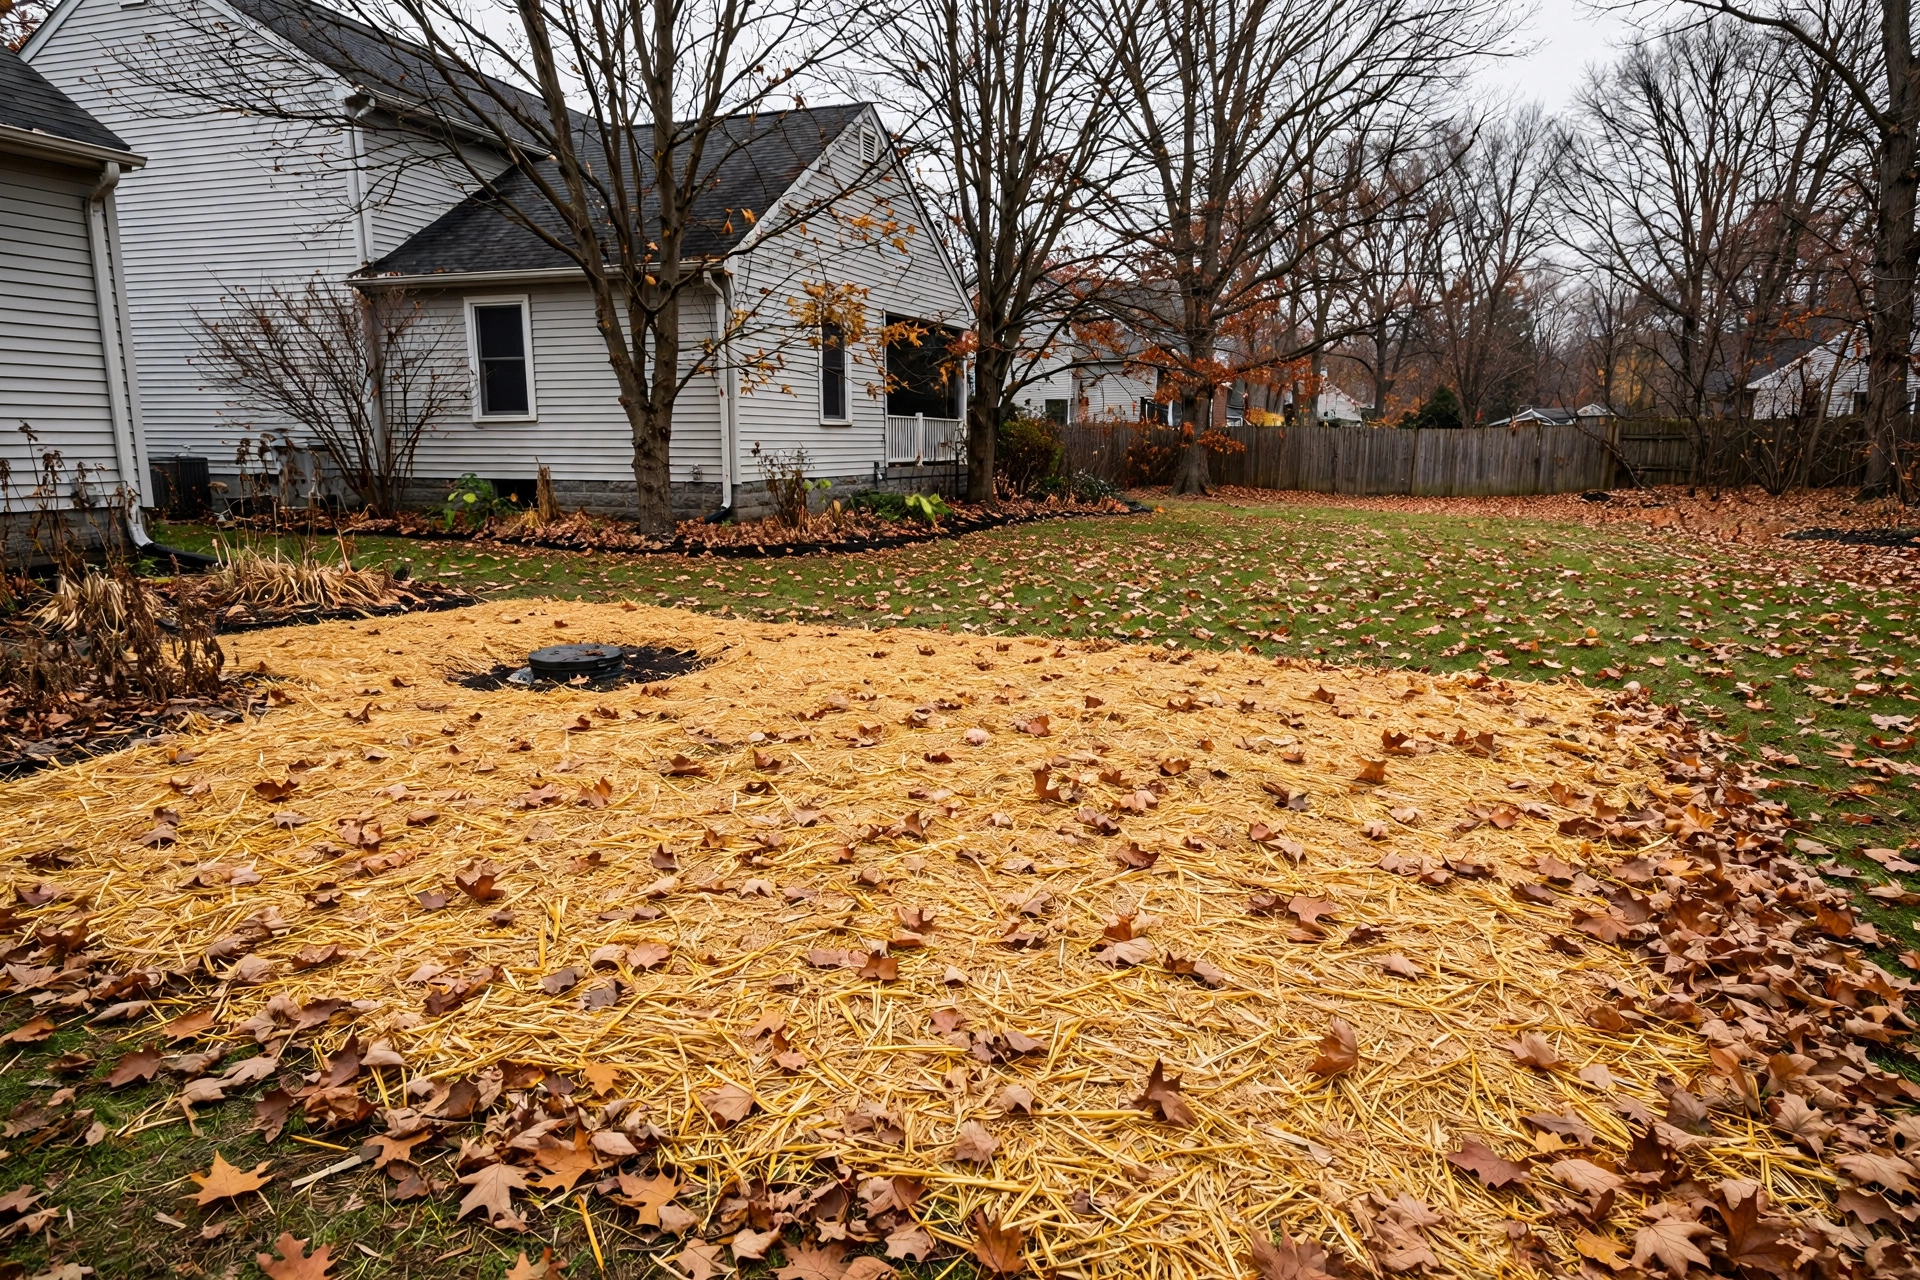
Mulch is the simplest and most effective insulation for a septic system, and it is the step most homeowners can do themselves in an afternoon. The idea is straightforward. A thick layer of loose, airy material over the tank, the inlet line, and the drain field traps the heat that is already in the ground and keeps frost from reaching the pipes and the tank below. Soil that stays unfrozen keeps working. Soil that freezes solid does not. The difference between those two outcomes is often just a layer of straw, leaves, or mulch spread at the right time.
Spread mulch, straw, or loose leaves eight to twelve inches deep over the tank, the inlet line, and the drain field. That depth sounds like a lot, and it is meant to be. A thin scattering of leaves will blow away in the first autumn wind and will do almost nothing once the temperature drops. A deep, loose layer holds air between the pieces, and that trapped air is what slows the cold. Straw works especially well because it stays loose and does not pack down easily. Loose leaves work too, though they tend to settle and mat down over time, so check the layer after a few weeks and add more if it has thinned. Wood mulch is also fine, and it stays in place well in windy spots.
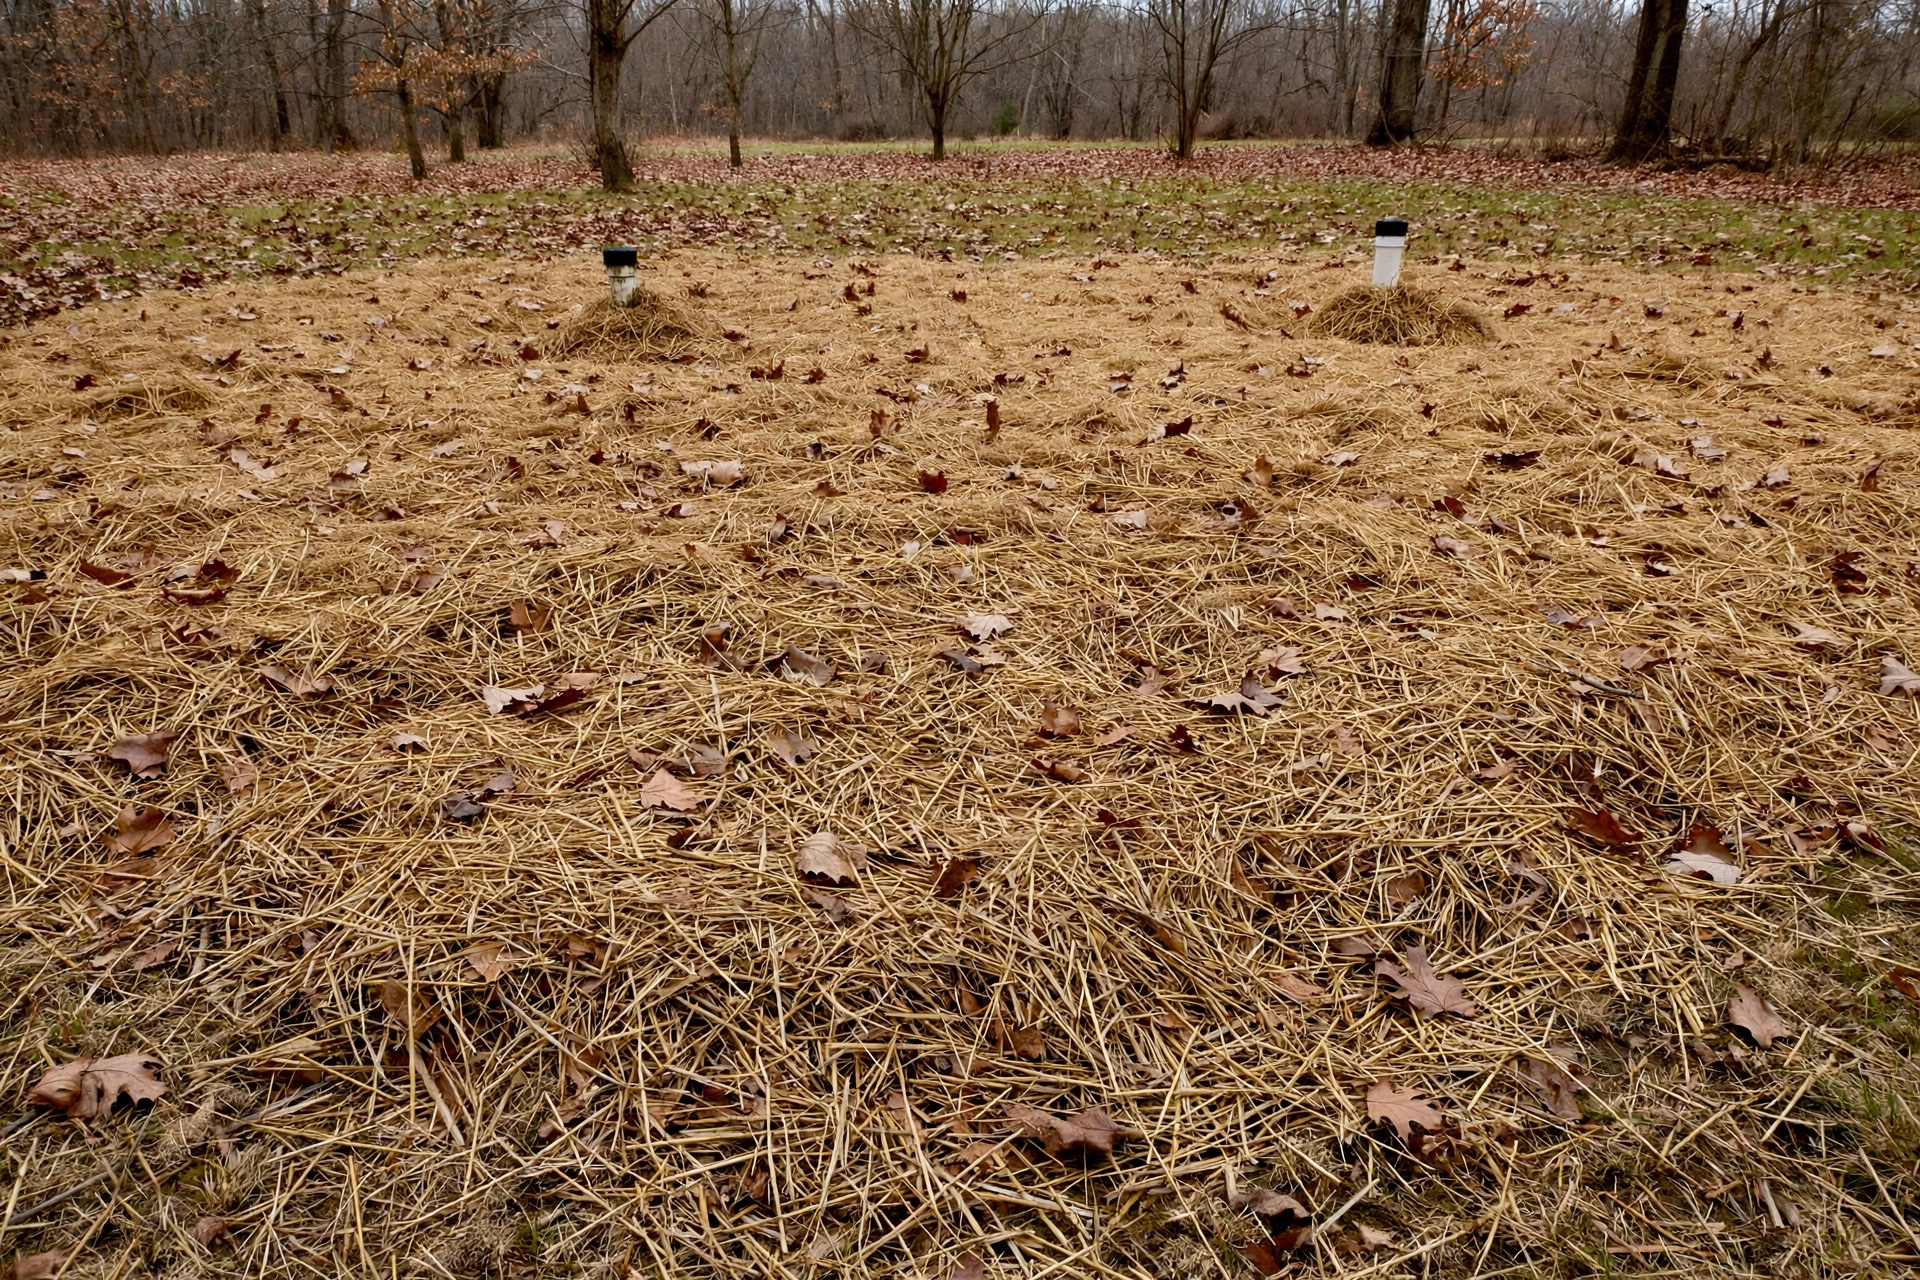
Cover the full area, not just the tank lid. The tank is only one part of the system, and the drain field covers a much larger area of the yard. Spread the mulch over the whole drain field, over the pipe run from the house to the tank, and over any distribution box if you know where it is. Pay special attention to the tank lid, which is often the shallowest and most exposed part of the system. An insulated blanket made for tank lids can help here as well, laid over the lid before the mulch goes on. Rigid foam boards are another good option, placed over the tank lid, the distribution box, and along any shallow sewer lines where the pipe sits close to the surface.
There is one thing not to do here, and it matters. Do not add fill dirt or compact soil over the system as a way to insulate it. That sounds like a sensible idea, but it works against you in two ways. Compacted soil freezes faster than loose soil, because it holds less air and conducts cold more easily. It also restricts the oxygen the drain field needs to treat wastewater properly. More dirt is not more protection. Loose mulch is the right material, and a deep layer of it is the right approach. Avoid anything that packs down hard, holds water, or blocks air from reaching the soil, such as heavy clay, gravel, or plastic sheeting over the drain field.
Step Three: Insulate Exposed and Shallow Pipes
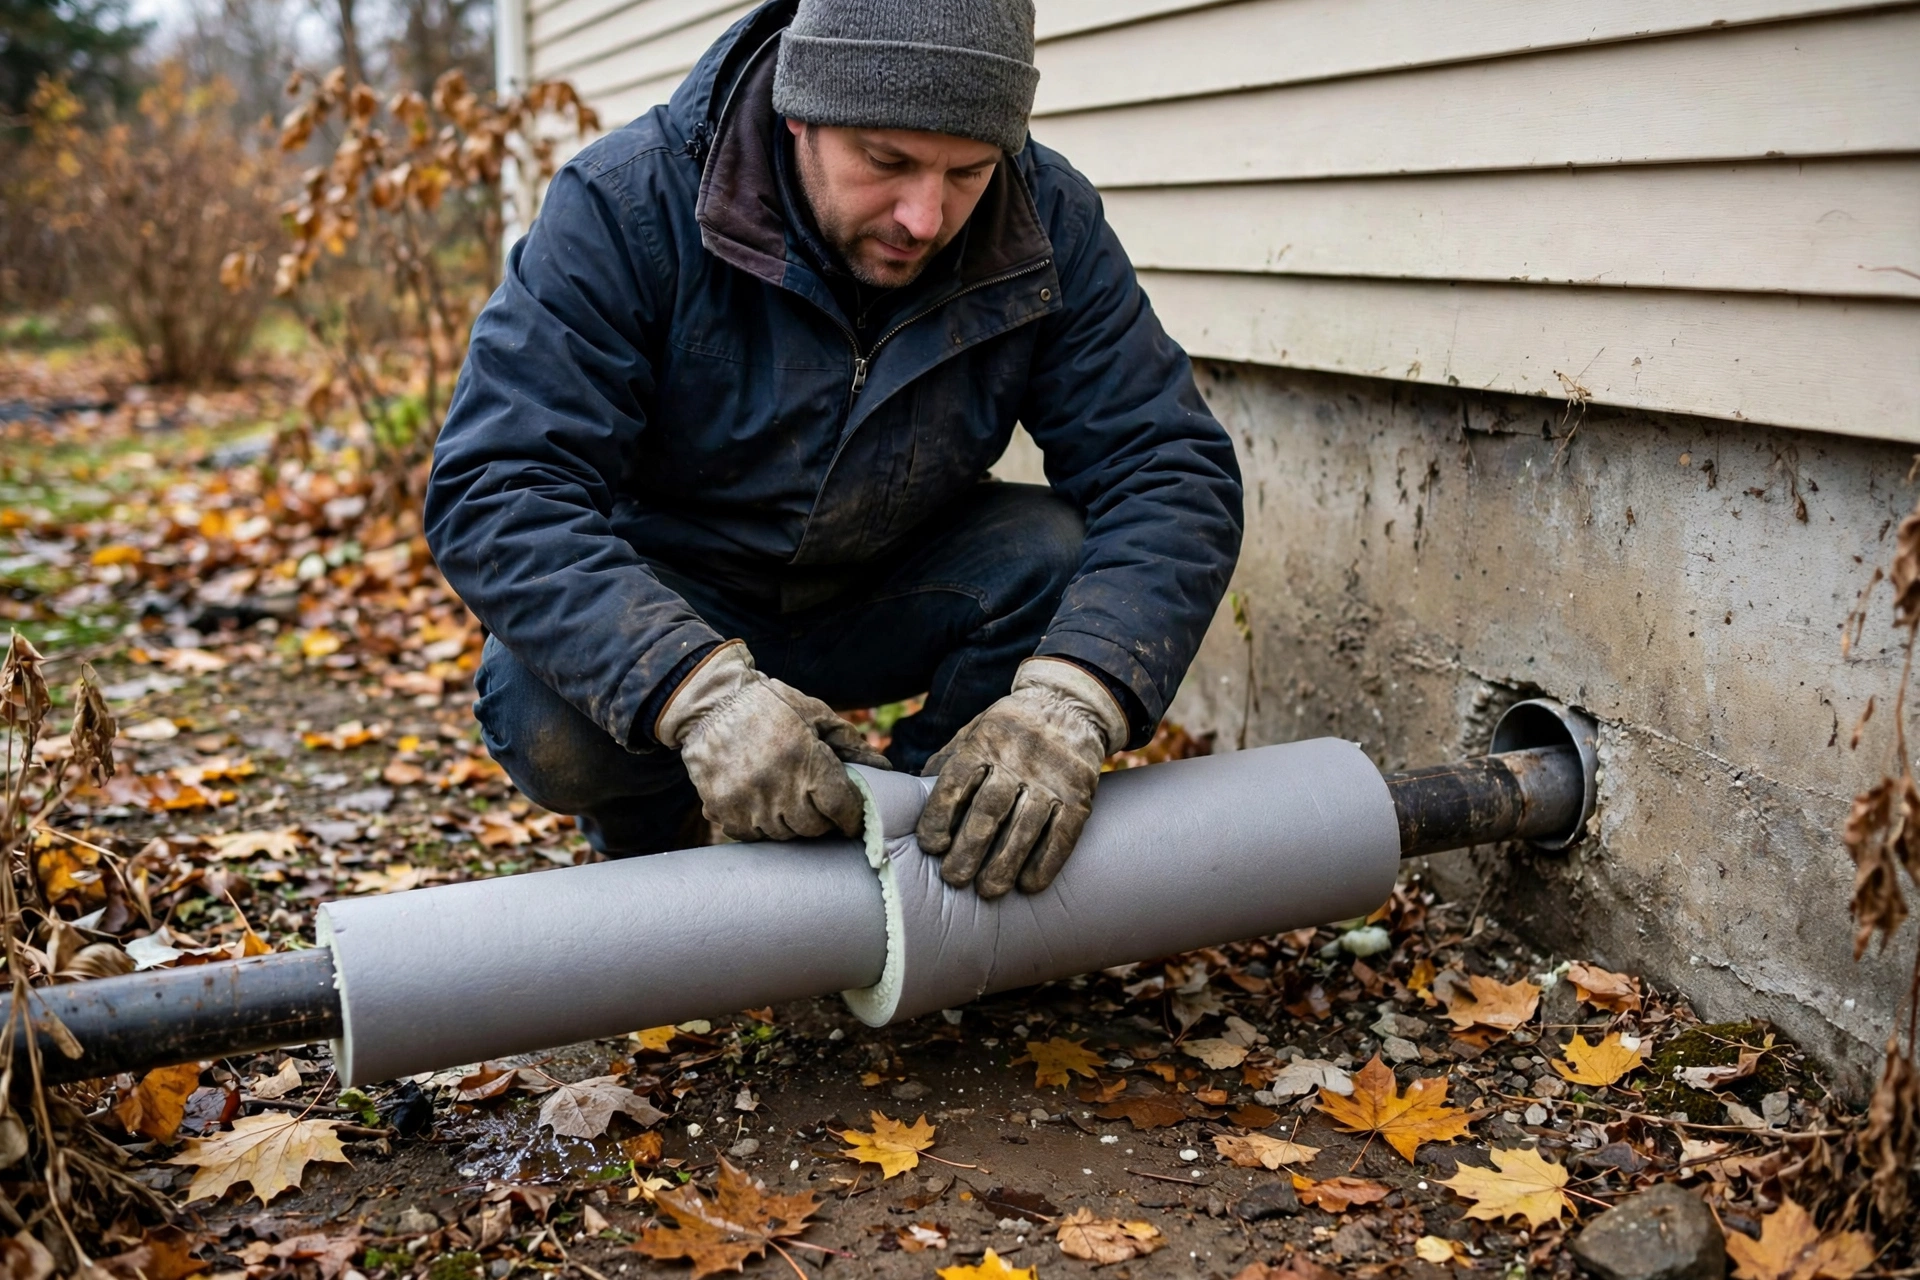
Exposed pipes are the most vulnerable part of a septic system in winter, and they are also the easiest to protect. Walk around the outside of the house in the fall and look for any pipe that is visible where it leaves the foundation, runs along an outside wall, or crosses an unheated crawl space or basement. These are the pipes that freeze first, because they have no soil around them to hold heat. A pipe that runs through a cold crawl space is nearly as exposed as one that runs outside, and it deserves the same attention.
Foam pipe insulation is the simplest fix, and it is available at any hardware store in pre cut tubes that slip over the pipe and close with a slit along one side. Measure the pipe, buy the right diameter, and slide the foam over every exposed section, including the bends. Seal the joints with tape made for pipe insulation, and make sure there are no gaps where cold air can reach the pipe. The job takes less than an hour for most homes, and it is the kind of small task that is easy to put off and easy to regret in January. If a pipe runs through a crawl space, insulate the whole run, not just the part you can see from the access door.
Heat tape is another option for pipes that are especially exposed or that have frozen before. Heat tape is an electric cable that wraps around the pipe and warms it gently when the temperature drops. It is more involved than foam insulation, because it needs a power source and must be installed according to the instructions, but for a pipe that has frozen in the past it can be the difference between a quiet winter and a repeat problem. If you use heat tape, pair it with foam insulation over the top, so the heat stays around the pipe instead of escaping into the cold air. Check the tape in the fall to make sure it still works, and replace it if it is damaged or very old.
Step Four: Let Grass and Snow Insulate the Drain Field
One of the easiest winterizing steps is also one of the most counterintuitive, which is to do less to the lawn over the drain field in the fall. Let the grass over the drain field grow a little longer through the fall, and skip the final close mowing over that area. Longer grass holds air between the blades, and that trapped air acts as insulation for the soil underneath. It also catches and holds snow, which is itself one of the best insulators a yard can have. A lawn that is cut short in late fall loses both of those benefits at once.
Snow is insulation, and that is a fact worth remembering when the first snowfall arrives. A layer of snow over the drain field traps ground heat in the same way mulch does, keeping the soil below it warmer than the air above it. That is why you should not shovel, plow, or pile snow off the system. Clearing snow from the drain field strips away its natural insulation and exposes the soil to the full cold. It also invites traffic onto the field, because a cleared area looks like a path or a parking spot. Leave the snow where it falls over the tank and the drain field, and clear your driveway and walkways instead.
Step Five: Use Warm Water Wisely Through the Winter
Warm wastewater is what keeps a septic system from freezing, and your daily water use is the source of that warmth. Every shower, load of laundry, and dishwasher cycle sends warm water through the pipes and into the tank, and that steady flow of heat is the most important defense the system has. A system that receives regular warm water through the winter is far less likely to freeze than a system that sits idle for days at a time. This is why a house that is lived in through the winter usually has fewer freeze problems than a house that is only visited on weekends.
The key is to spread water use out through the day rather than running many loads back to back. Doing all of the laundry, running the dishwasher, and taking long showers in a single evening sends a large surge of water into the system at once, and then leaves it idle for hours while the cold works on the pipes. Spreading the same amount of water across the day keeps warm water moving through the pipes at regular intervals, which is what prevents ice from forming. It also gives the drain field time to absorb each load before the next one arrives, which matters in winter when the soil absorbs water more slowly. Our guide to how to prevent a septic system from freezing covers the same habits in more depth.
Step Six: Fix Leaks and Running Toilets Before Winter
A small leak that is only an annoyance in the summer can become a real problem in the winter. A slow trickle of water from a leaking faucet, a running toilet, or a dripping pipe can freeze into an ice plug inside a pipe, and once that plug forms, the pipe behind it is blocked. The water that should have drained away has nowhere to go, and the pressure builds up behind the ice. This is one of the most common causes of frozen septic pipes, and it is also one of the most preventable, because the leak is usually visible and the fix is usually simple.
Walk through the house in the fall and check every fixture. Listen for a toilet that runs after flushing, or one that refills on its own during the night. Look under sinks for slow drips, and check the pipes in the basement and crawl space for damp spots or stains that suggest a leak. A toilet that runs constantly is the biggest culprit, because it sends a thin, steady stream of cold water into the system around the clock. That stream is too small to carry much warmth, and too steady to let the pipe dry out, so it is exactly the kind of flow that freezes. Replacing a worn flapper or a faulty fill valve is a cheap repair that takes minutes, and it is worth doing before the cold arrives.
Step Seven: Divert Surface Water Away From the Drain Field
Start with the gutters and downspouts. Walk around the house during a rain and watch where the water goes. Downspouts that empty near the foundation or that discharge onto the lawn above the drain field are sending water exactly where it should not go. Extend the downspouts so that they carry water well away from the house and the drain field, and make sure the ground slopes away from the foundation rather than toward it. Clean the gutters in the fall as well, because a clogged gutter overflows in exactly the wrong place, usually right next to the house, and that water can find its way to the system. After a storm, see our guide to septic problems after heavy rain for what to watch for.
Step Eight: Winterizing a Seasonal or Vacation Home
A seasonal home or a vacation cabin needs more care than a home that is lived in all winter, because it loses the one thing that keeps a lived in system warm, which is regular warm water flowing through it. When a house sits empty for weeks or months, the pipes and the tank cool down to the temperature of the ground around them, and there is no daily flow of warm water to keep ice from forming. Winterizing a seasonal home is therefore a fuller job, and it is worth doing carefully, because a frozen system discovered in the spring can mean months of delay before the house is usable again.
Start by having the tank pumped before you leave for the season. A tank that is left full over the winter has more material in it that can freeze, shift, and cause problems, and a full tank is also more likely to push solids toward the drain field if anything goes wrong. Pumping before closing up the house is the single most important step for a seasonal home, and it should be done while the ground is still soft and the pumping truck can reach the tank easily. Ask the technician to inspect the system at the same time, so that any problem is found before winter rather than after it.
Shut off the main water supply and drain all fixtures and pipes before you leave, so little standing water is left to freeze and burst a pipe.
Use RV antifreeze in toilet bowls and traps only, and never pour antifreeze into the septic system itself. The traps under sinks, showers, and tubs hold a small amount of water to block sewer gases, and that water will freeze if it is left in place. A small amount of RV antifreeze in each trap and toilet bowl protects those spots without harming the system. Regular automotive antifreeze is not the same product and should never be used in plumbing, and no antifreeze of any kind should be poured into the tank or the drain field. The bacteria in a septic system are sensitive to chemicals, and antifreeze can damage the treatment process that the system depends on.
What Not to Do When Winterizing
Some of the worst winter septic advice is also the most common, and it is worth naming clearly so that you can avoid it. Never use antifreeze, salt, or septic additives to winterize or thaw a system. Antifreeze is toxic to the bacteria that treat wastewater, and pouring it into a tank can do lasting damage to the system. Salt does not thaw a frozen septic system in any useful way, and it can harm the soil in the drain field. Septic additives are not a winterizing product, and they do not prevent freezing. No additive can replace pumping, insulation, and regular warm water flow, and some additives can actually disrupt the treatment process.
Never start a fire over the system to thaw it. This is dangerous in the most direct sense, because a fire over a septic tank can damage the tank, the pipes, and the soil, and it can release gases that are hazardous to breathe. It is also ineffective, because the heat from a surface fire does not reach a frozen pipe in any controlled way. A fire is not a thawing method. It is a hazard, and it should never be used on or near a septic system for any reason. Never run water nonstop as a thawing method either. Leaving a tap running all winter sounds like a simple way to keep pipes from freezing, but in a septic system it is the wrong approach, because all of that extra water goes into the tank and then into the drain field, which is already absorbing water more slowly in the cold. A system that is flooded with running water can become saturated, and saturated soil freezes and drains poorly.
What to Do If Your System Freezes Anyway
If the frozen section is an accessible pipe, such as one in a crawl space, a basement, or just outside the foundation, it can sometimes be thawed with hot water or a space heater. Use hot water, not boiling water, poured slowly over the frozen section or applied with towels soaked in hot water. A space heater placed at a safe distance can warm the air around the pipe gradually. Keep the heater away from anything flammable, never leave it unattended, and never use a torch or an open flame on a pipe. The goal is gentle, steady warmth, not a sudden blast of heat that can crack a pipe or damage a joint.
If the frozen part is buried, or if you cannot tell where the freeze is, call a professional. Buried components need equipment and experience to thaw safely, and digging into frozen ground without knowing where the pipes run can cause more damage than the freeze itself. A septic professional can locate the frozen section, thaw it with the right tools, and check whether the freeze caused any lasting damage to the tank, the pipes, or the drain field. After a freeze, watch the system closely for a few weeks. Drains that are still slow, toilets that flush weakly, or wet spots in the yard can all be signs that the system has not fully recovered.
Your Fall Winterizing Checklist
Use this checklist in early fall, and work through it in order. The tasks that need a professional come first, because they take the longest to schedule, and the tasks you can do yourself follow after.
- Book fall pumping and inspection, and have the technician check the tank, the baffles, the lids, and the drain field.
- Confirm where the tank, the inlet pipe, and the drain field are located, and mark them with stakes or flags.
- Spread mulch, straw, or loose leaves eight to twelve inches deep over the tank, the inlet line, and the drain field.
- Insulate exposed pipes with foam, add heat tape where a pipe has frozen before, and place rigid foam boards over shallow lines and tank lids where needed.
- Let the grass over the drain field grow a little longer, and plan to leave snow in place over the system all winter.
- Fix leaking faucets and running toilets, and check pipes in the basement and crawl space for drips.
- Clean gutters, extend downspouts away from the drain field, and make sure paved surfaces drain away from the system.
- For a seasonal home, pump the tank, shut off the water, drain the fixtures, add RV antifreeze to traps and toilet bowls only, and mark the system clearly.
- Keep vehicles and heavy traffic off the drain field, and pile cleared snow somewhere away from the system.
- Spread water use through the day all winter, and keep an eye on drains for early signs of a freeze or a backup.
Frequently Asked Questions
When is the best time to winterize a septic system?
Early fall is the best time, before the ground freezes and while a professional can still reach the tank easily. Pumping, inspection, mulching, and pipe insulation are all straightforward in September or October, and they are all difficult or impossible once the soil is frozen. If you have missed the early fall window, do what you can as soon as you are able, and focus on the steps that do not need digging, such as insulating exposed pipes, fixing leaks, and spreading mulch over the parts of the system you can reach.
Should I leave a tap running to keep the septic system from freezing?
No. Running water nonstop sends a large volume of extra water into the tank and the drain field, which is already absorbing water more slowly in cold weather. That extra water can saturate the soil and make the system work worse, not better. Spread your normal water use through the day instead, so that warm water flows through the pipes at regular intervals without flooding the system. If a pipe has frozen, reduce water use and call a professional rather than running more water through a blocked system.
A Quiet Winter Starts in the Fall
Winterizing a septic system is not a complicated project, and it does not require special skills or expensive equipment. It requires a little attention in the fall, while the work is still easy, and a little awareness through the winter, while the system is doing its job underground. Pump and inspect the tank early, spread a deep layer of mulch over the tank and the drain field, insulate the pipes you can see, fix the leaks you can hear, and keep warm water moving through the system on a steady schedule. Leave the snow where it falls, keep traffic off the field, and send surface water somewhere else.
Greetings Glows Team is dedicated to creating meaningful, helpful, and thoughtfully curated content for everyday inspiration and special moments.
What We Focus On:
Well-researched and reader-friendly articles.
Meaningful greetings, blessings, prayers, and inspirational messages.
Carefully curated ideas for everyday life and special occasions.
Clear, helpful, and engaging information.
Consistent quality and attention to detail in every publication.
Our goal is simple: to make every visit worthwhile with content that inspires, informs, and brings a little more positivity to your day.
1 thought on “How to Winterize a Septic System Before the First Freeze”